
I was not even slightly surprised when I opened the December 2014 Model Railroader Magazine, to encounter “RFID for Model Railroad Operations.” There seems to be considerable interest in RFID among model railroaders, enough that there is JMRI support available, and this project looks like a particularly nice piece of work.
The illustrations caught my eye and I recognized that at the heart of their system is an open source microcontroller board called the Arduino Uno.

Arduino Uno R3
You have to know what you are looking at, or dig into the article to get that bit of information. A one sentence editor’s note explains that Uno’s are “simple computers that can be programmed to do many useful model railroading tasks.”
Oh, my. That’s no way to introduce a hobby to a new dance partner. We’ve met once before in the June 2013 Model Railroader Magazine article “High Tech Turnout Controls.” But everyone was a little shy back then, there was really not enough information about the new partner to truly understand its potential. Referring to unseen computer code that has to be compiled and uploaded was probably a bit frightening to some. And, I suppose it didn’t help that the servo installation presented was, shall we say, a little too utilitarian.
No matter. Lets start over and get the introduction right this time, because the dance has already begun!
What is a Microcontroller?
Microcontrollers are integrated circuit chips that have the basic logic and input/output capabilities that constitute a simple computer. Microcontroller boards place that chip with a few essential external components on a board with power and ways to plug things in. Microcontrollers have been around for a long time; you’ll find them in almost everything electronic. What’s new is how inexpensive the chips and supporting components have become.
The best known, and by far best developed open source microcontroller board system is the Arduino Project. In their words:
Arduino is a tool for making computers that can sense and control more of the physical world than your desktop computer. It’s an open-source physical computing platform based on a simple microcontroller board, and a development environment for writing software for the board.
Microcontroller boards like Arduino are simpler than microcomputers like the Raspberry Pi or the Beaglebone. Aside from differences in the controller/processor used, the big difference is that microcomputers come with more peripheral components and memory to allow them to load an operating system. You don’t generally use an “operating system” with a microcontroller: rather the board is designed to run whatever code you’ve loaded in the board’s permanent memory. In essence, your program is the firmware/operating system for the board.
The Arduino interacts with the physical world using sensors and actuators. Sensors can be anything that responds to an external influence:
- buttons and switches,

Micro Push Button
- optical sensors, such as photoresistors, IR/UV and so on,
- current and voltage sensors,
- touch and proximity sensors,
- RFID sensors,
- GPS and other position sensors, include tilt and acceleration,
- USB and various kinds of network communications,
- anything that can produce a 0-5v current to signal its state, either as an on/off (digital) signal, or as a variable current (analog).

Combination accelerometer, gyro and magnetometer
Sensors can be a single chip/component, or another board or external assembly that communicates with the Arduino.
The code you upload to the Arduino can read the sensors and take logical actions based on those readings. It takes actions by controlling actuators. Actuators include:
- AC/DC motors,
- servos & steppers,
- switches, relays, transistors and other current amplification and modulation devices,
- LCD’s, LED’s, OLED’s both individually and in arrays up to and including small screens,
- USB and various kinds of network communications.
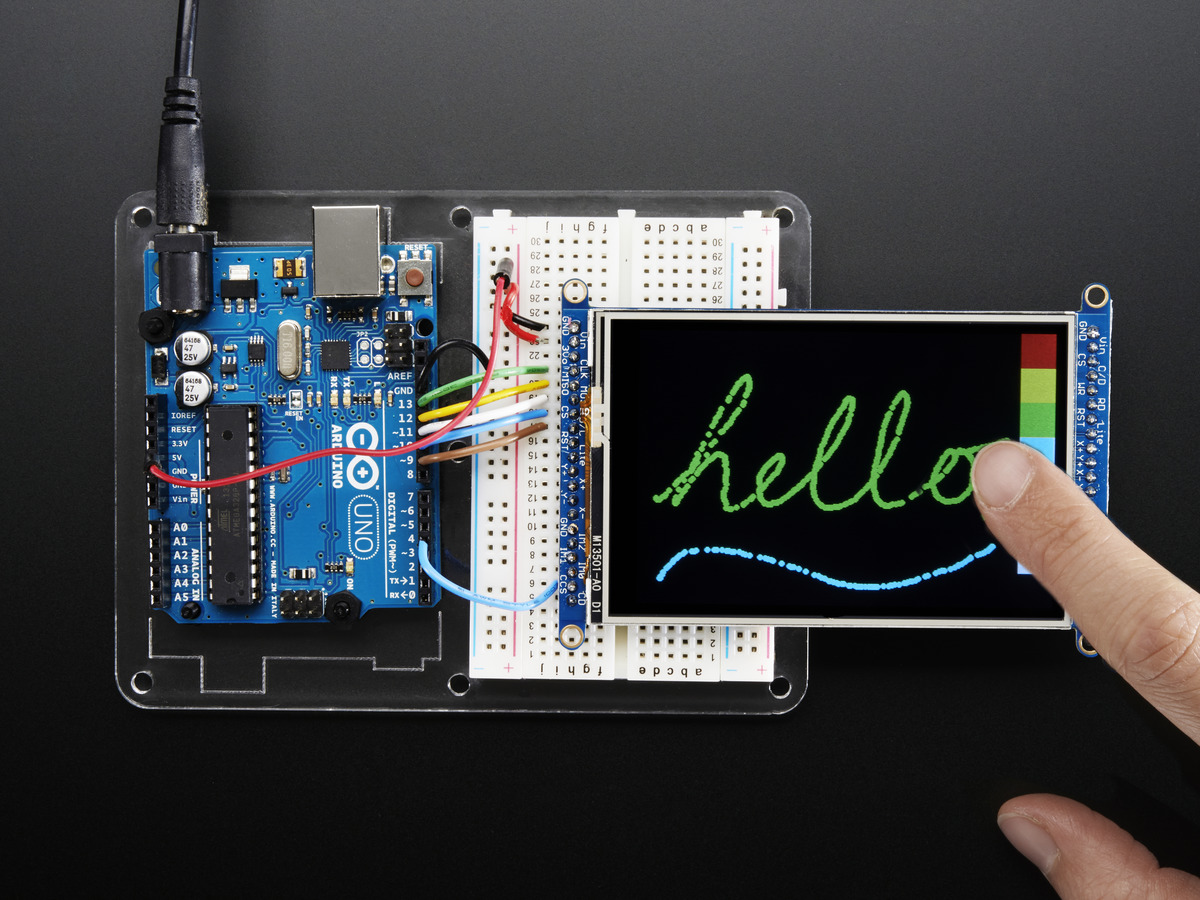
Adafruit 3.8″ TFT Touchscreen and an Uno
Adafruit Industries has the above touchscreen, along with a lot of other cool sensor and actuator devices to use with Arduino.

Stepper motor.
The basic structure of an Arduino sketch (program) is a continuous loop that checks the sensors and acts as required. Depending on the complexity of the sketch, the basic sense/act loop can cycle hundreds or thousands of times per second. Since you are directly interacting with the hardware without an operating system, your sketch has fairly precise control of all interactions.
Programming?
The Arduino is a teaching and learning tool. If you don’t know anything about computer programming, this little board was designed for you! You don’t really have to know C++ (the language used by the development tool) as such; you just have to learn and follow the basic rules as applied to the Arduino, all laid out in the tutorial system. If you can do basic math and logic, you can learn this.
If anything, novices may have an advantage over folks who program larger and more complex systems–who may have to rethink a few habits to adapt to the limits of the Arduino. The Arduino IDE hides most compiler preprocessing, which is great for newbies and lousy for those used to having total control of the preprocessing/compiling process.
Lets take the basic use case–turnout control–as discussed in the June 2013 MRR article. I’ve done a little Q&D on the basics of setting up and using a servo for turnout control; take a look to see what the code looks like. It’s a lot more straightforward than you might expect.
But What’s it For?
So turnout control is one use, but it may not be entirely clear why this is better than traditional turnout motors and wiring. From my point of view, it comes down to leverage: getting a lot more functionality for the money.
Given that a single Arduino Uno ($25) can support multiple micro servos costing $2 – $4 each, its easy to see how an Uno running 4 turnout servos is saving money; even more if one Uno can manage an Yard full of servos. Other functions that might be handled by accessory contacts on an expensive turnout machine can be handled easily by the Arduino at the same time, like running signals, managing track power relays or triggering other systems. As you stack related functionality onto a network of Arduinos, instead of investing in multiple single-purpose systems, the combined enhanced functionality and cost savings of this approach becomes quite compelling.
Among model railroaders on the web who are working with Arduino, the most common thread I’m finding is to use the Arduino as an adjunct to the DCC system. An obvious approach is to use a stationary decoder as a “sensor” that the Arduino responds to with whatever task you have in mind — for instance, this would work well where the Arduino is an animation controller.
To get an Arduino and DCC system to communicate with each other without a decoder, you could use the generic USB interface, which most Arduino boards and many DCC systems support. Since DCC systems don’t speak Arduino, something like JMRI is needed to glue it all together.
Others, like the Model Railroading with Arduino project, an off-shoot of the Open DCC Project, are working on direct Arduino/DCC interfaces. It’s pretty straight forward to interface an Arduino with the DCC command bus. Check out this project using an Arduino Mini to create a 17 function DCC decoder. As to the unreasonably low price the author reports for his Arduino Mini Pro, please see this post about Arduinos, compatibles and counterfeits. If you find these things useful and want the benefits of further development, then you should care about the ecosystem. An official Mini Pro from SparkFun lists for $9.95. and a portion of its proceeds are given back to the Arduino Project.
Controlling turnouts with servos and an Arduino, RFID decoding or even creating a “programmable DCC decoder” using an Arduino represents a small fraction of the potential of these devices. The trend today seems to be toward greater centralization of model railroad control systems. Embedded microcontrollers can be a step down that road as well, adding considerable functionality as “decoders with brains”; or they can take you in an entirely different direction–where semi-autonomous logic devices controlling different aspects of the layout interact with each other and with the operators in dynamic ways.
I’ll give a little more substance to these ideas as this project progresses.
One thought on “Model Railroader, Meet Arduino”