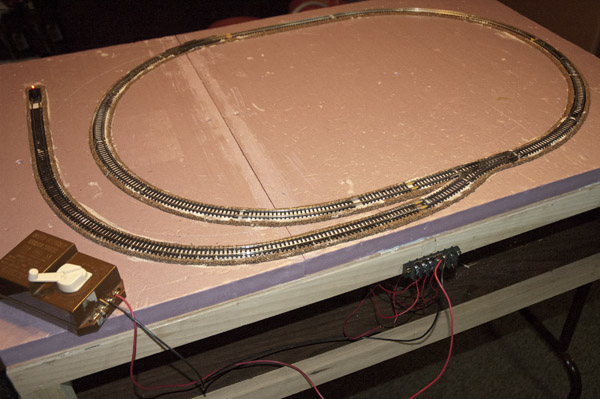
I decided to try a track laying method that has been shown a few times in Model Railroader Magazine and elsewhere: adhering track to the roadbed with caulk. I hate nailing track. At HO its doable, but at N I find it very difficult. So I really wanted the caulk to work.
 I evaluated several products at the store before settling on DAP ALEX Painters Acrylic Latex Caulk. ALEX fills the bill because it is designed to adhere to a range of building materials, including impermeable plastics and vinyl. Easy cleanup is a nice bonus.
To my delight it works well as a track adhesive. Initial ‘grab’ is great, but you can move things around a bit while it is fresh; using thin layers, all that is necessary to solidly adhere track to roadbed, you get about 5 minutes working time. I used about 20% of a tube for all the track on the test loop.
I’m finding quilter’s T-Pins incredibly useful for laying both cork roadbed and track. I bought two sizes, 1 1/4″ and 1 3/4″, at Michael’s. (Woodland Scenics markets a version of these as 2″ Foam Nails). The 1 1/4’s are perfect for holding N scale track down which the caulk is setting–they fit through the nail holes in the Atlas N sectional track I’m using for the test loop. Push them down until the head rests on the tie and the track will be secure. Remove them after the caulk sets. The bigger ones worked by inserting them between ties and using the head to hold the track down. Either way, T-Pins are a great help; the smaller ones at Michael’s seem just the right size for working in N scale.
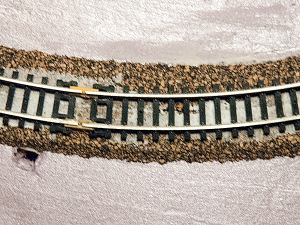
While the test loop is mostly old Atlas sectional track, I did use a piece of Peco code 80 flextrack from my ample supply to do the spur. This turned out to be a little more challenging because the Peco flextrack I have (bought quite a while ago) does not have nail holes in the ties. The key to putting the 90 deg, 9 3/4″ radius bend into the track was in the deployment of pins: mostly along the outside rail to hold the bend, with a few pins between ties along the inside rail to hold the track down, while the caulk set.
In my arid climate the caulk sets sufficiently within 1 hour to allow removal of the pins.
While you want to keep the caulk layer thin to avoid goo getting above the ties, there is such a thing as too thin–adhesion will fail as it dries if there was not enough caulk. If you can see through the caulk layer, it’s too thin.
I had to go back and correct a couple of spots where there was insufficient adhesive. When you get the amount right it works perfectly.
Without really thinking about it I selected white caulk at the store. There is some possibility white caulk would show through ballast; another color might be a better idea. The product is paintable, so a thin wash could be used to disguise the caulk after it has dried.
I kept the caulk well away from the moving parts of the turnout — an area it might show through anyway if ballast coverage is thin for operational reasons. As to the test loop, I’m not going to ballast it for the time being.
I created 4 electrical blocks, using some ugly orange Atlas insulating joiners where needed. Fine for the test loop, but not the way I’ll do it on the layout. I soldered all the track at the metal joiners along with one feeder set for each block. One wouldn’t normally do multiple blocks on something like this, but it’s a test bed, right?
First test with a real loco was a success with no serious problem spots!
I have to say the test loop is some of the smoothest track I’ve ever laid. I won’t call it perfect, but the improvement from prior efforts is quite apparent. I have to give credit to the materials, and particularly to the caulk adhesive track laying method. I’m pretty sure now that reliance on nails to hold track down in the past was the root of a lot of track problems. With the caulk method it is easy to avoid the subtle distortions of track from the laying process that are hard to find and fix.
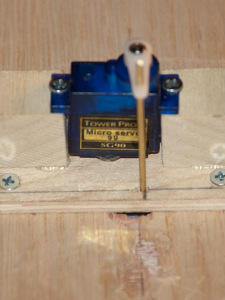
An off-the-shelf micro servo (about $5) controls the Peco short turnout. How does that work? That is the subject for another post.


